Aimee and I took a day to go to London to get the few final crucial elements of the costumes as well as heading to view the Linbury prize.
Buttons were the crucial thing to buy as we needed authentic leather and horn buttons for the Narrators suit and the soldier's shirt buttons. The members of Button Queen were really helpful in showing us all their choices in a range of colours and assisting with sizes. We came out with the buttons below which I believe will tie in nicely to the colours of the suit and will make it look true to the era.
For the Soldier's buttons we bought two types as he showed us what would have been used, yet these would've been on a darker fabric than our shirt but as they were accurate and only 15p we bought them in case they worked. The alternative was white mother of pearl buttons of a lightly larger size which will still suit the era but will tone in with the shirt better.
We managed to find some fabric to create the straps for the bag, but it will need dying and breaking down. As for the Princess's shoulder clips we bought two options that's shape and colour tied in with the existing silver trimming and still looked fairly antique and regal. We liked each for different reasons, and thought a combination of the two could also be used. We bought 2 choices as we knew it would be difficult to find two antique articles that matched exactly. For the chain for the back of the Princess dress we looked hard for the right type of crystals and finding a set that looked suitably old and antique we then found this is because they have been on the display wall for years. However, we went for these anyway, planning to tea stain and varnish them to make them look suitable.
Our final trip was to the National to rummage through their hire department. Most important to find were the Brogues for the Narrator... only one pair in size 12 were available so looking nicely worn but not too much, so we took them as a back up pair as they will look right. Their slightly reddy colour might actually tone in well with the maroon tie and the red stripe in the suit fabric.
We also took a dress from their broken down Edwardian section for the washer woman as it had nice detailing and will pad out well if we decide to pad a big bra to go beneath for a hugely womanly silhouette. To go with it we took a red shawl, as red is going to be introduced in each of the Devil's characters to show a continuity and relate to the red contacts. We also took a broken down hat for the Cattle merchant which is similar to an authentic photograph I have and collected a WWI tunic and cap for the Soldier which will now be used in the first few scenes and which the Devil will later steal from him.
Reflection:
This was a good experience to learn picking out and identifying an era and character in a costume from a huge selection and really knowing each character well. This is especially necessary with time constraints. This has reitterated to me how crucial it is to have period accessories and final touches, such as buttons, to make them authentically convincing. It was also good to help with my skills on managing a budget as we only had £200.00 for the day and this meant when hiring I had to prioratise which costumes were completely necessary and appropriate for the era out of the selection we had made. I was happy with my choices.
Wednesday 30 November 2011
Production meeting
Production meeting was called today over some confusion about technical drawings etc. and just to see where everyone was at in general. Following is the meetin agenda which discusses all the topics of the meeting and outcomes. I am glad we all met as it defined my tasks for the up coming weeks much more clearly as John will now be buying some items such as the matting that goes beneath the pallets which makes life easier for me as without a car travelling to places such as the range are more difficult and consume a lot of time. It is Amber's responsibility to add in the projection screen on the ground plan that she has created as I have marked it into my box but she needs to confirm these measurements to ensure everything will definitely fit behind the screen.

Reflection:
This was extremely helpful and it is a shame that one has not been called after the beginning of rehearsals until now as it helped define each persons role in this production more, which is something that I have struggled with throughout this process and has often been slightly complicated, where I have either assumed certain jobs such as ordering in set items are or aren't my job. Either way they have been and will be done but I feel my time has been used inefficiently in some instances due to this. It is also clarified scheduling and technicalities such as lifts to the studio3 next week as well as getting to meet the rest of the ASM's now In Extremis is over.

Chandeliar
Having considered the light fitting and seeing their rehearsals I have decided to remove the idea of a drop down chandeliar. As the scene is set by candlelight this will create the atmosphere in itself and will not need the added chandeliar. In addition to this I have been considering the best way to do it in a way that seems cubist and also translates as a chandeliar but will look period too. In the sketches I have played with and looking at how I could manipulate existing light features, I haven't found anything I am truly satisfied with and as in my model box the chandeliar was thought more to be a bird I think the idea is not likely to be successful. It would have been different if I could actually light the fitting but as this is not possible and for the reasons above I have decided to cut this from the design. I think ultimately it would detract rather than add from this scene.
Tuesday 29 November 2011
Discussion with Debs
I rang Debs this morning who will be helping with Set painting on the 5/6th of December. I am so excited to have a professional painter to come and work on the pros and realise my design, especially after seeing her work on the previous show. Today we spoke so I can get the gist of paints/materials I will need to buy for monday. The list is as follows, (I have marked on where to get them from):
- Flints Black Theatre Paint - Left over In Extremis
- Emulsion matt glaze - Left Over In Extremis
- Other emulsions for set - Paint collection in studio Theatre/ B and Q match pots
- Muslin for water texture - Haberdashery
- Polyblock - Sheffield Insulations
- Bread knives - Kitchen
- Polythene - Wilkinsons
- White spirit - The Range
- Brushes available - Studio Theatre/ Own
- Idendum - In Extremis
Reflection: This chat was really helpful and she also suggested getting started on the polyblock texture before her arrival so I will arrange for a few people to come down to the set build on Sunday and get started whilst we build as she said it can take time. Luckily as many of these items were ordered for the previous show there is quite a lot remaining that we can use saving cost and time sourcing paints etc. Debs also said she will bring some of her own equipment and rosco paints if they are of use.
Meeting With Technical Draughtsman
Today's meeting marked the real start of our show after months of working out the design it is finally time for the build. We went through our respective list of to do's and deliberated who would do what. Amber's immediate job was to do a Groundplan and further technical drawing and mine to source and order certain aspects of the set and arrange the painting days.The ending of In Extremis and the opening of our show threw me slightly as the amount of time we have to get stuff ordered is very little. However, as some of the materials I needed were the same as Rhiannon's I could ask her for some of the best companies to use for material quality and cost. Budgeting is also my responsibility.
Reflection:
I panicked after this meeting with the amount that needed to be done and was my responsibility. Not necessarily doing things but being able to get around without a car makes things take a great deal longer. One thing I wish had been clarified fully during the initial stages of this term was the definition of each person's role within the production and what it included as I felt I could have begun doing these tasks a lot earlier if I had been aware that most of the ordering was down to me. However, I think due to the previous show finishing so close to ours meant that alot of technical requirements weren't finalised until this week which also meant that certain aspects of set could not be ordered until now, eg. the curtains, curtain poles and wood.
From this situation I did what I could and worked as fast as I could to make sure that everything would arrive on time. This was a struggle in the case of the Styrofoam, but it was done. I have learnt from this to foreplan in detail so I am ready for when items need to be ordered so I have a good idea of price, quantity and delivery time and can compare companies. I will also make sure in future to clarify my role instantly so I can again foreplan effectively.
Sunday 27 November 2011

Stencilling
I have spent this week drawing up the stencils to be used on the pallets and the Pros as Richard said these can be done in advance to save time on the build and painting weekend. I have used card as it will lie flat against the wooden surface, is easy to cut and will be durable enough to used for this instance (only once each). I have modelled the text on words I have seen in Cubist work, but also on the research into pallets I did and the markings that they have too.
 |
| Stencil of 'Ramuz' for pallets |
Friday 25 November 2011
Rehearals 25/11/11
 |
| The Devil and the Soldier about to play a fateful game of cards |

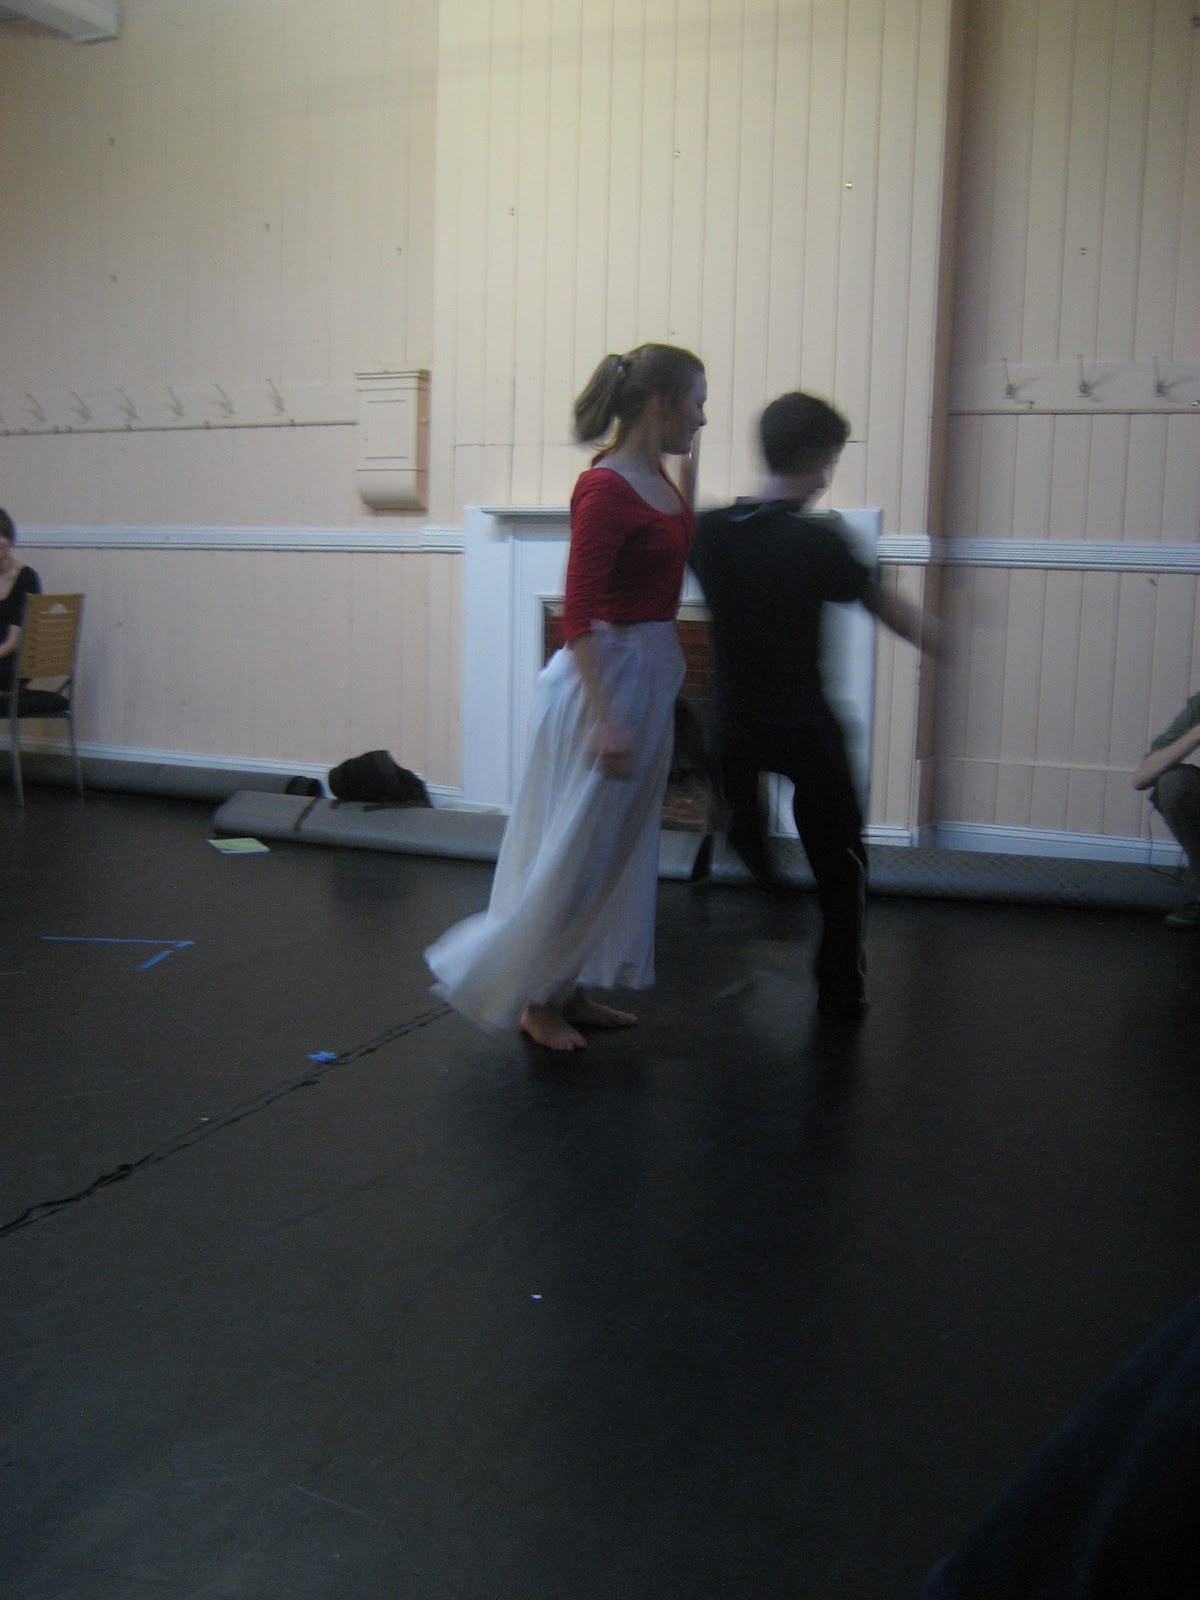 |
| The Soldier and Princess during Valtz |
 |
| The Soldier awakening the Princess |
 |
| The Devil's Dance |
It was great to catch up with rehearsals today to give a really positive and exciting end to the week. It is amazing how far they have come in what seems like such a little amount of time. It is difficult with the limited space to truly explore the potential of the ocean room space until we are actually in there but I think when doing so it will look fantastic. I know Doug has been playing with the action and the Pros arch and for the most part action begins within the Pros then spills into the space which I really love and intended it tobe used. It feels as it the story is being pulled out of the theatre and into life!
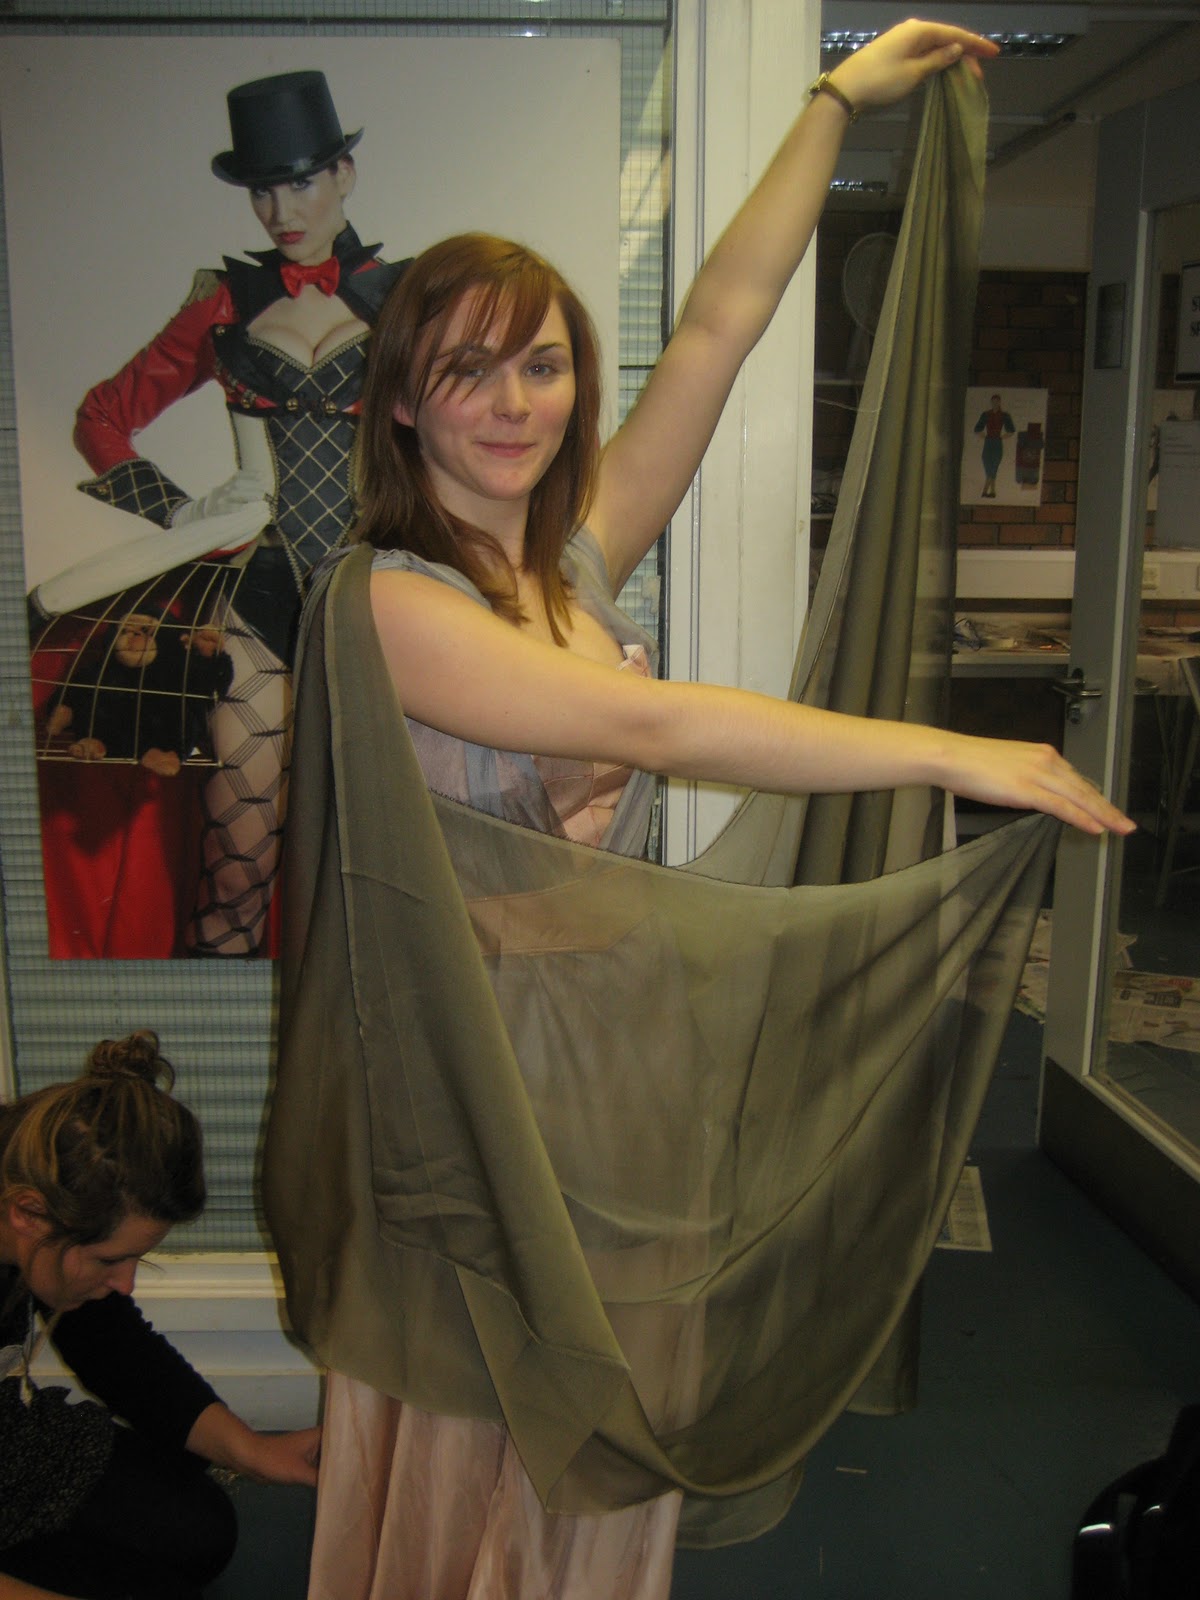
The dances look fantastic and in the skirt toile the movement of the fabric is just spectacular, I can't wait to see her in her regal entireity. The Devil also will look decadent in her final entrance in costume and cape. As for the coat they were using for the cattle merchant that we found in the store I think actually looks great - not only historical and in character but it fits both Rhiannon and Josh well which works when she forces him to wear it.
I spoke with Doug and Pete about the possibility of the Devil being revealled through Gauze at the back of the Theatre as the violinist. This may work as the masking walls may be made from Gauze anyway in which case she can hide behind the back wall otherwise an alternative solution may need to be formulated. Another thought I had watching the positioning of the block that having hand holes/ disguising them as crates so they are easier to manouver about. Doug was happy with my butterfly I just need to experiment with wire to attach it to to make it flutter!
The best thing about watching rehearsal was that it allowed Grace and I to time the places where the Devil is off stage and which we have to perform costume changes, which are as follows:
Old Man into Cattle Merchant - 7 minutes
Cattle Merchant into Clothes Woman - 4 minutes
Clothes Woman into Virtuoso Violinist - 6.5 minutes
Violinist into Devil - 8.5 minutes
Devil to add cape - 5.4 minutes
I am happy with these change times although they will still need to be fast they are within a comfortable time bracket, especially the Devil's final costume which is the most tricky as it will involve the leotard, bodice, yolk and headdress.
Reflection:
The production seems clearer and clearer as the acting progresses and witnessing the rehearsal really helped me visualise what they will be doing in, and their interaction with their costumes. It means Grace and I can start to anticipate any problems with costumes, especially in the Devil's case with writhing on the floor and her dance like, creepy movements. Estimating the time has been the greatest help as I now have a clearer vision of how we will perform changes and arrange things backstage for an efficient change and smooth performance.
Wednesday 23 November 2011
Orchestra Uniforms
Today posed a massive challenge as Aimee, having rung our costume hire company, discovered that the costumes we intended to order had infact been booked out until the 6th of December. Hearing this my heart sank but action was taken quickly to try and resolve the manner asap. I looked back to emails I had sent out in the summer to various hire companies for the uniforms and took down their details again to make contact, Grace also rang various companies to see what they had to offer and were available. Aimee also came across some uniforms in a shop we which we were planning to view with our measurement sheets tomorrow, however on her return with photos they were not quite right and it would also leave us to find all the shirts, missing trousers and most importantly shoes which would have ended up taking a huge amount of time and costing us a great deal more. Our most favourable alternative option was going to cost £150 plus vat. per costume which was beyond budget.
Eventually we came to a solution, to hire out the costumes on the 6th where Grace and Aimee could pick them up and check them over with our measurement sheets.They will then be brought back and hired for a week allowing us to spend a bit more on extra items in case they don't fit. Grace having rung Nick who is the contact for the Orchestra found that most of the players are at a rehearsal in Poole on the 7th which means we can fit them then prior to the 9th which is great luck. The other two members, if happy to do so, will be visited in their homes on the 8th to be fitted for the 9th also and the conductor fitted first thing on friday the 9th. Ultimately although fairly stressful will be the best option and will as a happy side affect reduce our hire cost slightly.
Reflection:
Sudden problems are likely to occur in this business and I have learnt from this that one must stay calm, think rationally as an alternative option will be available. We are lucky that we had time and the expertise of our course leader's to help in this situation but ultimately we found the best resolution relative to time, cost and achieving an authentic WWI look. Grace and I will have to make sure we are on top of costume and efficient this week so we are ahead for next week when she has to be away doing fittings. Grace will also now involve an assistant who can take charge of costume when she is away and I am involved in set which will be extremely helpful in saving us time and remaining organised.
Monday 21 November 2011
Set To Do list:
Thought it was time to write out a to do list so I can work out what I have to do in the two weeks to come prior to the set build. I have sectioned tasks into different categories to help priorotise certain tasks and know when I need to have materials available by. I will work with Amber to order materials of the right quantity, quality and specification. In the immediate future I will look into sourced items and begin the templates as I think these will be fairly easy to do by hand and will be ready for the painting day so we can be as efficient as possible in the time Richard and Debs are available.
The Soldier’s Tale Set To do
Source:
Corrugated iron
Pallets
Other wood needed
Black matting for pallets
Black lino for beneath pros.
Wooden planking
Cabinate/door
Orchestra antique chairs x8 (no arms, not too low)
Music stands
Fabric to cover music stands
Polystyrene
Dust sheets for curtains
Carpet for rostra
Curtain poles
Curtains rings
To buy:
Scenic paint – for aging wood, green/blue/brown/red/ochre/black/white
Black paint for flooring
Muslim/scrim for water texture
Nails
Wood
Masking tape
Hinges for boxes
To do Beforehand:
Make stencils
- Ramuz
- Stravinsky
- No. 1918
- Music notes
- Percussion
Plank boxes
Print large maps/text for collage
Age large text/collage
Paint bits of set stuck on
Age wood to be used
Paint floor
Collage floor Dec 2nd – 7th
Alter curtains to correct size
Break down/paint curtains
Breakdown cabinate /door
To do on 3rd/4th December:
Create pros
Make pallets
Felt/carpet rostra 2
Plank rostra 2
Attach iron to rostra 2
Fix pallets together
Fix curtain poles
Create pulley system
To do on 5th/6th December:
Stencil Pallets
Collage pros
Paint pros
Paint Pallets
Create water texture – paint
Sunday 20 November 2011
Corrugated iron
Some corrugated iron that my dad had hidden away. This look sufficiently aged and could be enough for the entire set ( I need to measure the box and check first of all). As it will be of no cost it would be perfect, however there is an issue of transport as it is 3 hour drive away - if this can be negociated it will prove a great find and be further recycling. The real, worn iron should look far superior to painted, plastic replica in evoking the feel of teh trenches.


Having measured the iron cladding in the model box and drawn a diagram, there is enough iron to clad the rostra on three sides with some remaining.
 |
| Diagram to scale 1:25 to check there was the right quantity of iron. |
Saturday 19 November 2011
Devil Second Fitting
This fitting highlighted how important it was to have the two previous fittings to ensure the fit near perfect as very little was adjusted during this fitting it was more about the aesthetic. With the dye work at its current stage the overall colour scheme is clear yet it is obvious all the textural work is yet to come...
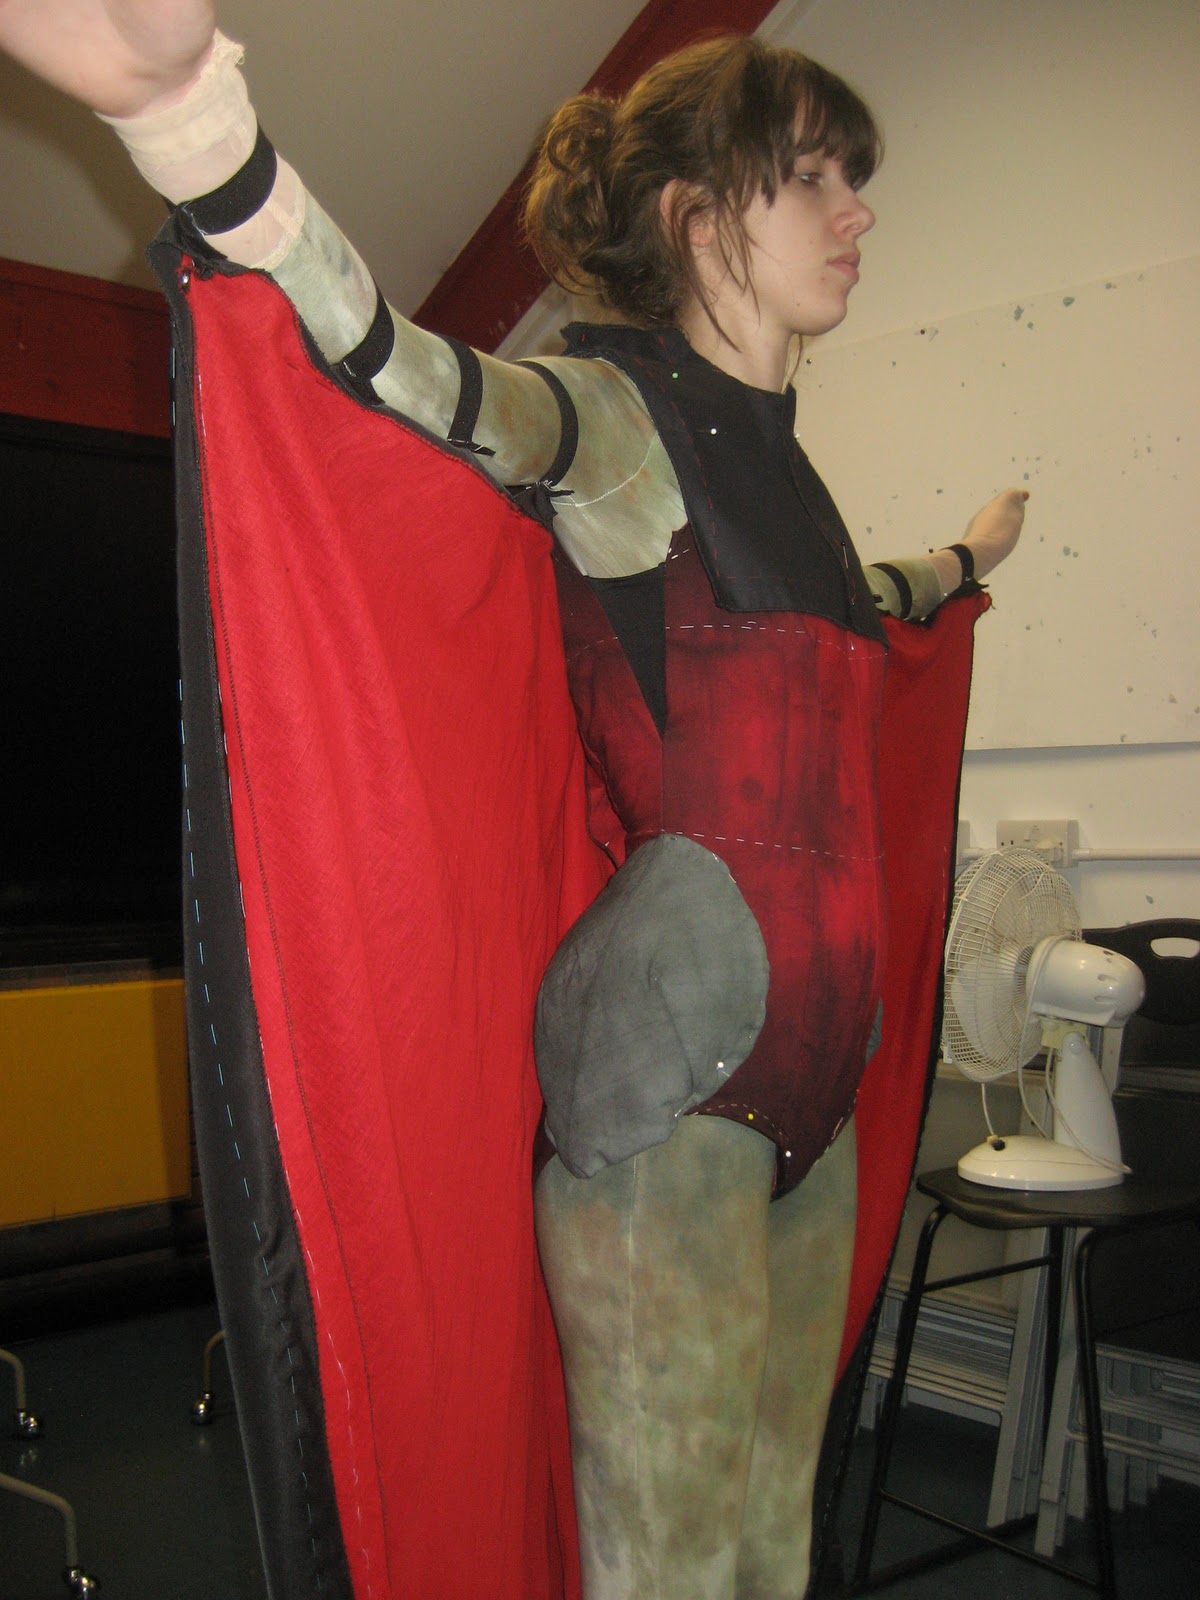 |
| Side view with cape and yolk. Shows the silhouette of the costume although in the case of the yolk particularly the silhouette of this will alter considerably once texture is added. It is a good fit but more work is needed to make the lycra patches less obvious. The cape is a lovely size, shape and drape and the red is bold and eye catching for the Devil's final scene. |
 |
| Back close up of the cape, although there was debate as to whether this gives the right look I do feel that the lustre of the fabric will look good on stage giving the Devil a magnificent, royal entrance and appearance when it catches the lights and moves gracefully. |
 |
| Cape from back - the shape is really nice but there was discrepancy as to whether the red and black fabric should be joined at the hem as I originally said it shouldn't. However, I can see that it can look unintentional so joining them will give it a professional finish. |
 |
| Cape arms down, bird like silhouette that relates nicely to the nature theme. The bodice silhouette matches design expertly. |
 |
| Rippled edge of cape looks really nice with the powerful black/red contrast |
 |
| Elastic along the arms will be white and hidden as roots, but the elastic does keep it tight to the arm so Rhiannon can manipulate it easily when moving and it looks part of the costume/creature as I wanted it rather than separate. |
 |
| Overall dying is looking great to give a mouldy/mossy appearance. Once the power net is worked into it will give a really seamless/ creature like look. Body and bodysuit fit really well which will enhance her body movement. |
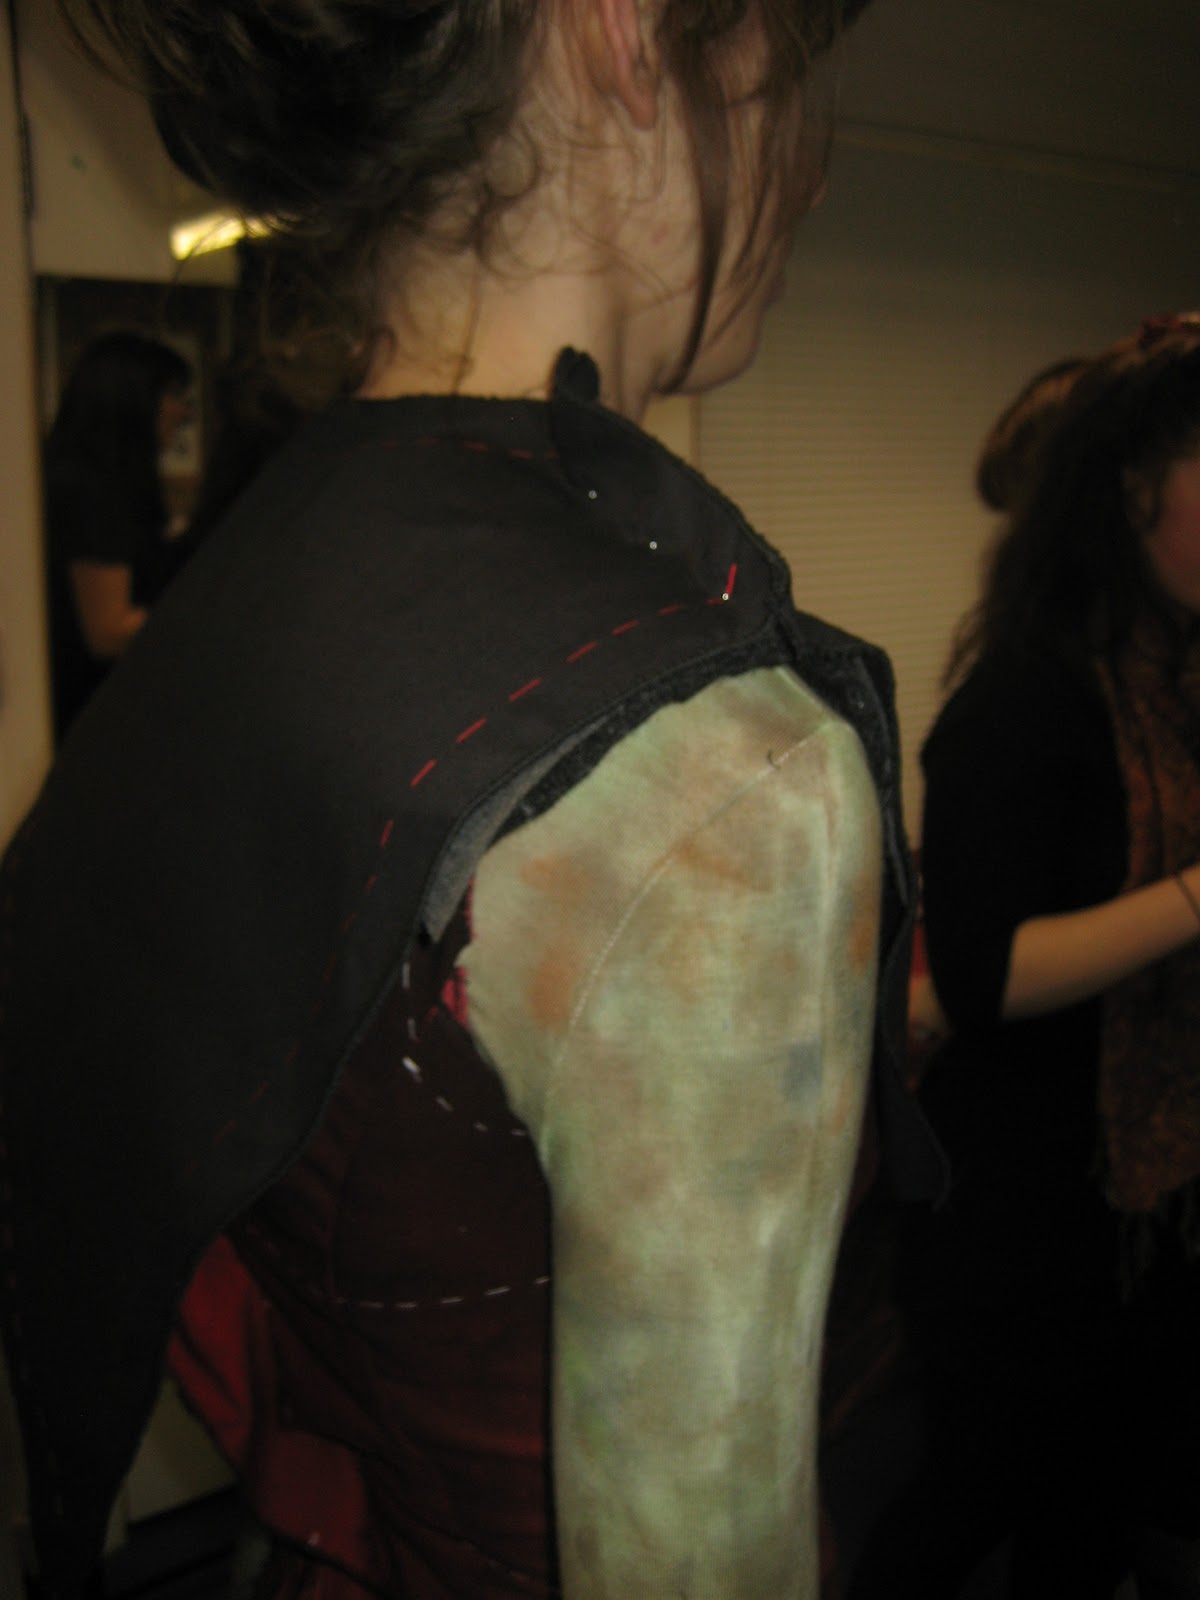
 |
| Back view with yolk - the cape will be worn beneath the yolk to prevent the cape becoming bulky and ugly as well as making the cape look like its part of her. The triangular shape works well and will look better with a softened textural edge - more like a lions mane to add to it being creature like. |
 |
| Bodice taken in at the centre back to perfect fit. Fits very well around the bum. |
 |
| Shoulder pad added to dramatise the silhouette further along with the hip pads. |
 |
| Hand detail - thumb holes have now been cut so the texture can cover the hands and blend with make up so it covers as much of the body as possible. Close up of dye work which is beautifully mottled and adheres to the design. |
 |
| Back view without yolk - some darker tonal work needs to be added to blend the legs to the bodice. Hip pads create a nice shape for the texture to sit on. |
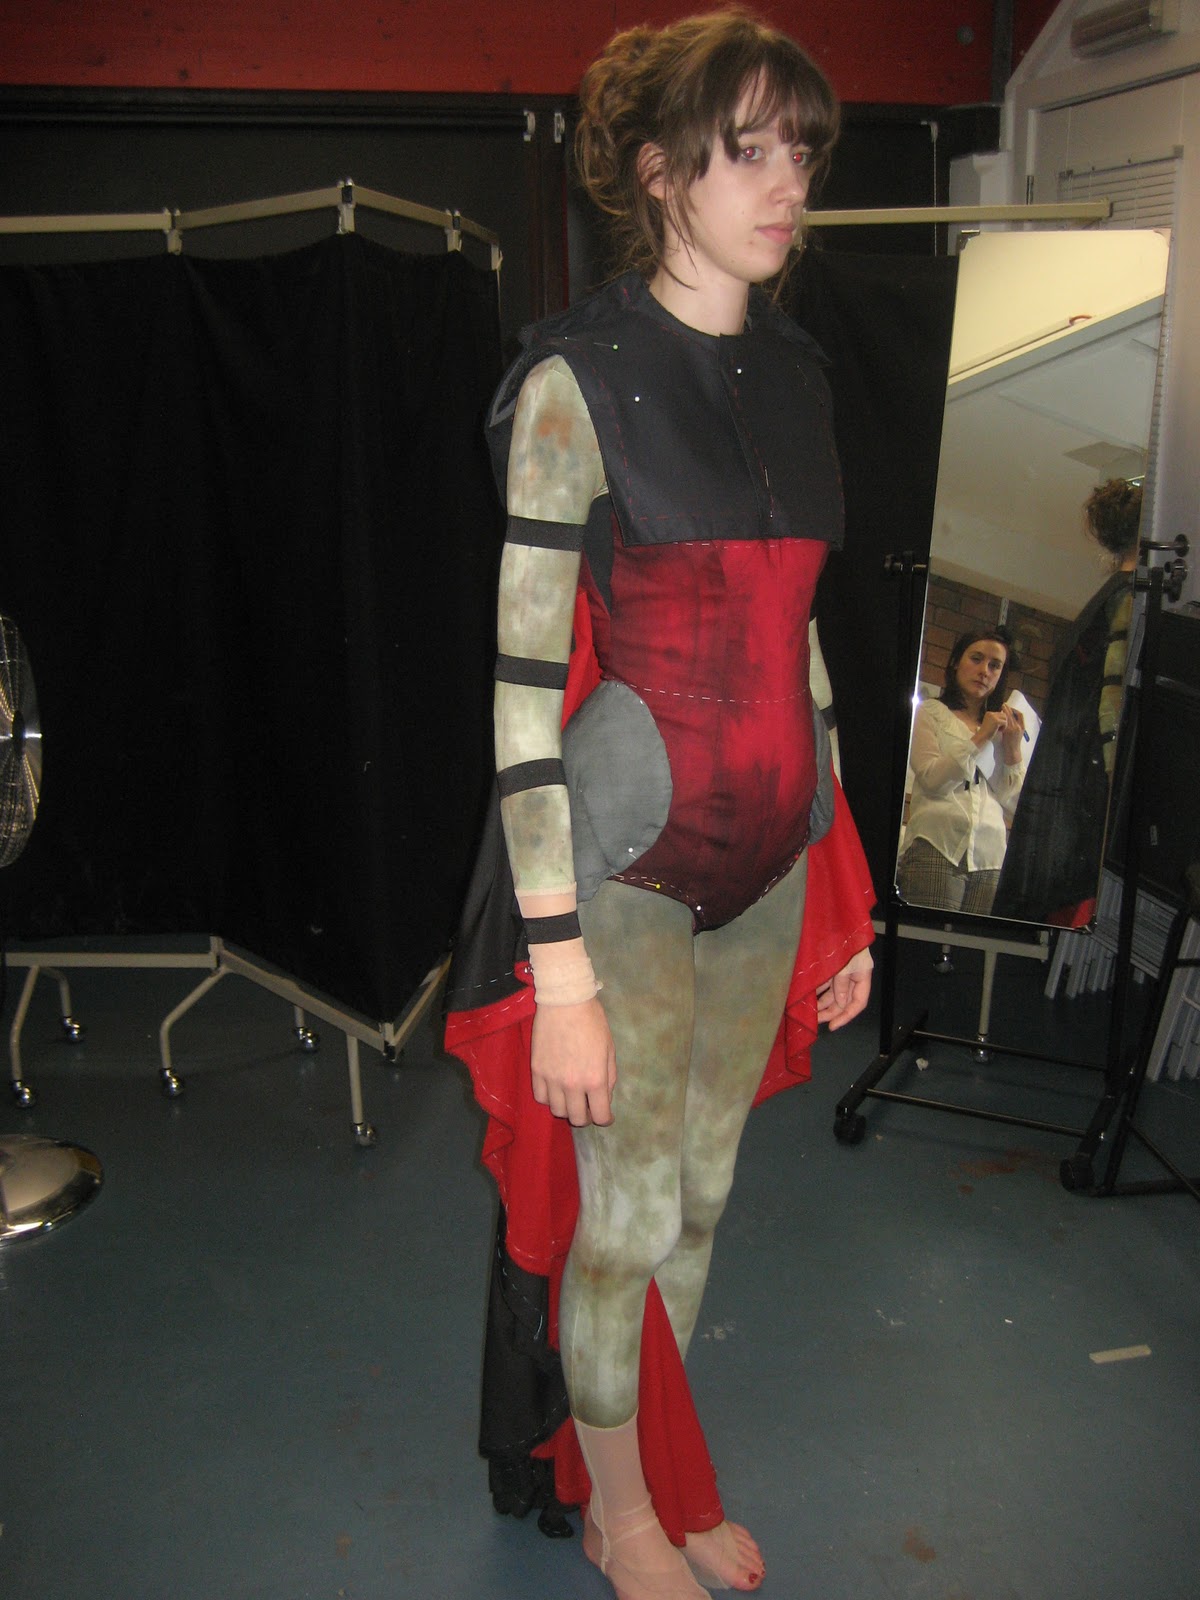
 |
| Side view of silhouette |
Reflection:
The Devil is coming along nicely and with Emily's textural samples I can really visualise it in the flesh as I know she has great ambition with this. It is a good fit and Rhiannon can move freely in it for her scenes of heavy, abstract movements, the cape only being worn for the final scene which has little action. The cape has the bold presence I wanted and works with the costume beneath. Shoes are an aspect to consider whether we buy fabric ballet pumps so they can be worked into to be part of the costume or whether she remains bare foot as I know this is her preference. The headdress is something I need to keep a close eye on as make-up are making it and it needs to be continuous with the costume. We will provide the materials from the costume to be used and help ensure this, but I will keep in close contact with the makeup maker to make sure it doesn't stray from the design too far. It was also discussed that the cape fabric could be used to create a butterfly for the old man in scene 1 to relate to the Devil's final costume and true self, I shall experiment with this idea.
To Buy/Hire:
- Fabric ballet shoes
Princess Second Fitting
This fitting was one I was more concerned about as I was worried the fabric wouldn't move or fit how I intended as well as the colours coming together. However, looking at it on Rachel the colour's really suit her and the pink and dusky grey/blue work really well together. Although in the original design the Princess is drawn bare foot with the pallets in the set a shoe will be better to protect her feet. A pink satin ballet shoe will be used as it will tie in with colour scheme yet is also slipper like which is in continuity with the fact that she has been in slumber until the Soldier arrives. These will wear down naturally if she wears them in rehearsals.
Reflection: I think the dress looks unbelievably beautiful and epitomises the Princess in its elegance, fragility and femininity. Rachel found it easy to move in and supportive which is excellent as she must be able to dance freely. As the Director said it was his favourite costume which I am very happy about as there could have been potential problems with it's movement and comfort. Once the finishing touches of trimmings and glitz are added it will have the regal feel it is lacking slightly at the moment. As with the Narrator for this garment it will be essential to get the finishings right. The shoulder clips, diamantes and beads will need to look of the era but also fit for a Princess. Rachel is going to borrow the skirt toile to practice the choreography in which steer the dancing to suit the costume from the outset and ensure they work seamlessly together.
To Buy/Hire:
 |
| Full front view shows that the colours look beautiful and the lining of the skirt is thick enough to prevent seeing any underwear but also acts like the top fabric. The silhouette is like the design but the peplum looks like it needs some evening out. |
 |
| Close up of the bodice beneath. This has been taken in slightly for a closer fit so it stays in place whilst she is dancing. The belt fits perfectly on the waist and I like the size, shape and piped edge. The gathers at the shoulders will need to be hidden with clips with hopefully some diamante's for a lustrous, rich look. |
 |
| Close up back view. The peplum needs evening out again here but it drapes nicely. This will be helped when the silver trimming is added to give it some weight. As the gathers at the shoulder keep falling off a string of either diamante's or the silver trimming will be added across the back from shoulder to shoulder to stop this happening. The cowl back falls very elegantly. |
 |
| Full view of back - on moving around Rachel found the dress very comfortable. The hem will be finished by overlocking once taken up to the correct height, the colour of the skirt fabric will have to match perfectly to make the hem invisible to the audience. |
 |
| The trimmings against the colour scheme. In the design loops of ribbon are falling from under the arm as the velvet isn't double sided this could look wrong however, I love the richness and texture the velvet adds to the garment. Hopefully making these loops smaller will keep the velvet right side up yet still enhance he movement. The silver trimming will be used along the neckline and peplum edge of the blue/grey chiffon. |
 |
| The embroidery design Beth has done for the belt which is stunning. It is a design from 1900 which sets the garment in its era even further. It adds to the femininity of the gown and also has a hint of regality about it. The colours of the stitches work with the existing colours and lift it slightly with the light blue. Rebecca suggested adding tiny beads along the trimming and the embroidery design to catch the light and add to a look of expense and its vintage quality. I think this will really make the costume. |
 |
| The cape fabric pinned into place with a curved hem this will look really beautiful . The shot gold chiffon gives a sumptuous look and definitely adds to her role as Princess. It will look gorgeous as it catches the light and billows as she dances. |
 |
| Demonstrating the elegant ripples of the silk. The deeper colour also brings another dimension to the costume as the colour scheme is very restricted, the gold breaks out from this and makes it look less flat. |
To Buy/Hire:
- 3 reels of quality cotton to overlock skirt hem (exact colour match)
- Diamante string for back
- Shoulder clips (2 identical )
- Tiny old sequins
- Satin Ballet pumps
Narrator Second Fitting
For the fitting for the Narrator we used the shirt form the initial fitting (from the costume store) which suits the era and fits very well. The shoes however were less successful, we found a pair which were brogues but were too modern, more 1940s than 1900s due to the chunky sole. They did have a perfect looking pair in a size 10 which is 2 sizes too small, however, this does give us something to look for. The braces weren't quite right either - slightly too modern and the elastic was quite worn so some of these will need to be sourced, yet they will not really be seen beneath the waistcoat. The hat is not entirely ideal either as it a little too worn and I feel the brim is slightly too large. However as the only brown bowler in the store it was worth a try and helps to visualise the complete outfit. It did in fact fit John very well.
Reflection:
This costume really embodies the Narrators character and it is obvious already John feels this way as soon as it's on. It relates to the period excellently especially in all the fine detailing. It is important that from here we ensure it stays that way when it comes to sourcing the shoes and such. Rebecca suggested 'Button Me' for the buttons that will have buttons in bone to fit the era and complete the authentic look of the suit. The Brogues also need to have a finer, leather sole which I was already aware of but still remains important. Cufflinks we can find in the store but are a detail that could easily let the costume down, I am imagining a simple brass looking cufflink at this time, but we will see what is available. I am extremely happy with the tie, also from the store but looks great with the tweed colouring. The deep red also gives off the warmth of his character. A problem did arise when it came to the matching of the check on the trouser and jacket. When dressing the Narrator for the show we will have to make sure that the braces are holding up the trousers evenly as otherwise it will make the check look skew to the jacket, very obvious with the size of the checks.
To Buy/Hire:
 |
| The shoes that I would like to have for the Narrator - perfect style, colour and level of wear. |
 |
| Waistcoat backview - shows a good fit. |
 |
| Waistcoat front showing a nice fit as well as correct design lines and matching of check. |
 |
| Full front view with Jacket. It fits very well across the chest although modifications of the arm hole are needed due to it being tight across the chest when John moves around. |
 |
| Close up of jacket lapels which are an authentic shape and size, they are in great proportion and will look fantastic when finished. |
 |
| The inside of the jacket demonstrating a pocket within and on the jacket and the waistcoat. These will be able to house the Narrator's numerous props. They are finished beautifully and I am happy with the decision to welt the smaller pocket but not the larger ones as the detailing looks sophisticated and smart. |
 |
| Back of the suit the fit is excellent as is the length. The cuff buttons will be positions on the back seam of the sleeve which is visible in this photograph. |
 |
| Full back view also showing the excellent fit of the trouser. They are narrowing slightly towards the ankle as they did in this era and the trouser crease is nice and even. The hem needs to be lowered slightly but this cannot be done until the shoes that will be worn have been sourced so it is accurate as possible. |
This costume really embodies the Narrators character and it is obvious already John feels this way as soon as it's on. It relates to the period excellently especially in all the fine detailing. It is important that from here we ensure it stays that way when it comes to sourcing the shoes and such. Rebecca suggested 'Button Me' for the buttons that will have buttons in bone to fit the era and complete the authentic look of the suit. The Brogues also need to have a finer, leather sole which I was already aware of but still remains important. Cufflinks we can find in the store but are a detail that could easily let the costume down, I am imagining a simple brass looking cufflink at this time, but we will see what is available. I am extremely happy with the tie, also from the store but looks great with the tweed colouring. The deep red also gives off the warmth of his character. A problem did arise when it came to the matching of the check on the trouser and jacket. When dressing the Narrator for the show we will have to make sure that the braces are holding up the trousers evenly as otherwise it will make the check look skew to the jacket, very obvious with the size of the checks.
To Buy/Hire:
- Cufflinks
- Buttons (sizes and quantity have been provided)
- Braces
- Brown Bowler
- Brown leather Brogues with a leather sole
Soldier Second Fitting
For this set of fittings both the Director; Doug and our course leader were present which although at first felt slightly daunting was in fact greatly helpful and reassuring. It was amazing to see the costumes in top fabric as now the production is evolving off the page in terms of acting the costumes are now advancing this even further. Doug especially appreciated this in developing their action but also to have a stronger visual of the production now the set design is also complete.
The Soldier looks fantastic and despite my earlier doubts now the shirt fabric has been washed a few times and been given a dye to dirty the bright white it looks great in texture and colour. Further washing and pressing will add to the wear once the shirt is completed. There were some minor alterations to the shirt including; removing the gathered appearance to the sleeves which was on Emily's historical pattern, reducing the shirt body in size and reducing the collar size a second time. Rebecca suggested adding details such as top stitching the shirt collar to add to its authenticity but also increase its standard of finish.
Reflection:
The costume looks beautiful and really evokes a period feel especially with the braces that Grace and I found in the store which match perfectly. The black belt was doubted at first by the course leaders, but after debate it was decided a brown belt would look too co-ordinated with the shoes and braces, the black adds something so this will be kept. A belt loop will need to be added as it is currently too large for the actor. The shoes that we did find in the store purely for the purpose of the fitting were not correct as they were too modern but Rebecca thinks a brown oxford boot would look the part as the shoes also don't reach high enough up the leg to meet the putties. Buttons are needed for the shirt which must be a mother of pearl shell to fit the period. The fit of the trouser was great and it looks truly authentic, the breaking down to be added to the shoes trousers and shirt will complete it, especially when combined with the WWI rucksack I have sourced.
To Buy:
The Soldier looks fantastic and despite my earlier doubts now the shirt fabric has been washed a few times and been given a dye to dirty the bright white it looks great in texture and colour. Further washing and pressing will add to the wear once the shirt is completed. There were some minor alterations to the shirt including; removing the gathered appearance to the sleeves which was on Emily's historical pattern, reducing the shirt body in size and reducing the collar size a second time. Rebecca suggested adding details such as top stitching the shirt collar to add to its authenticity but also increase its standard of finish.
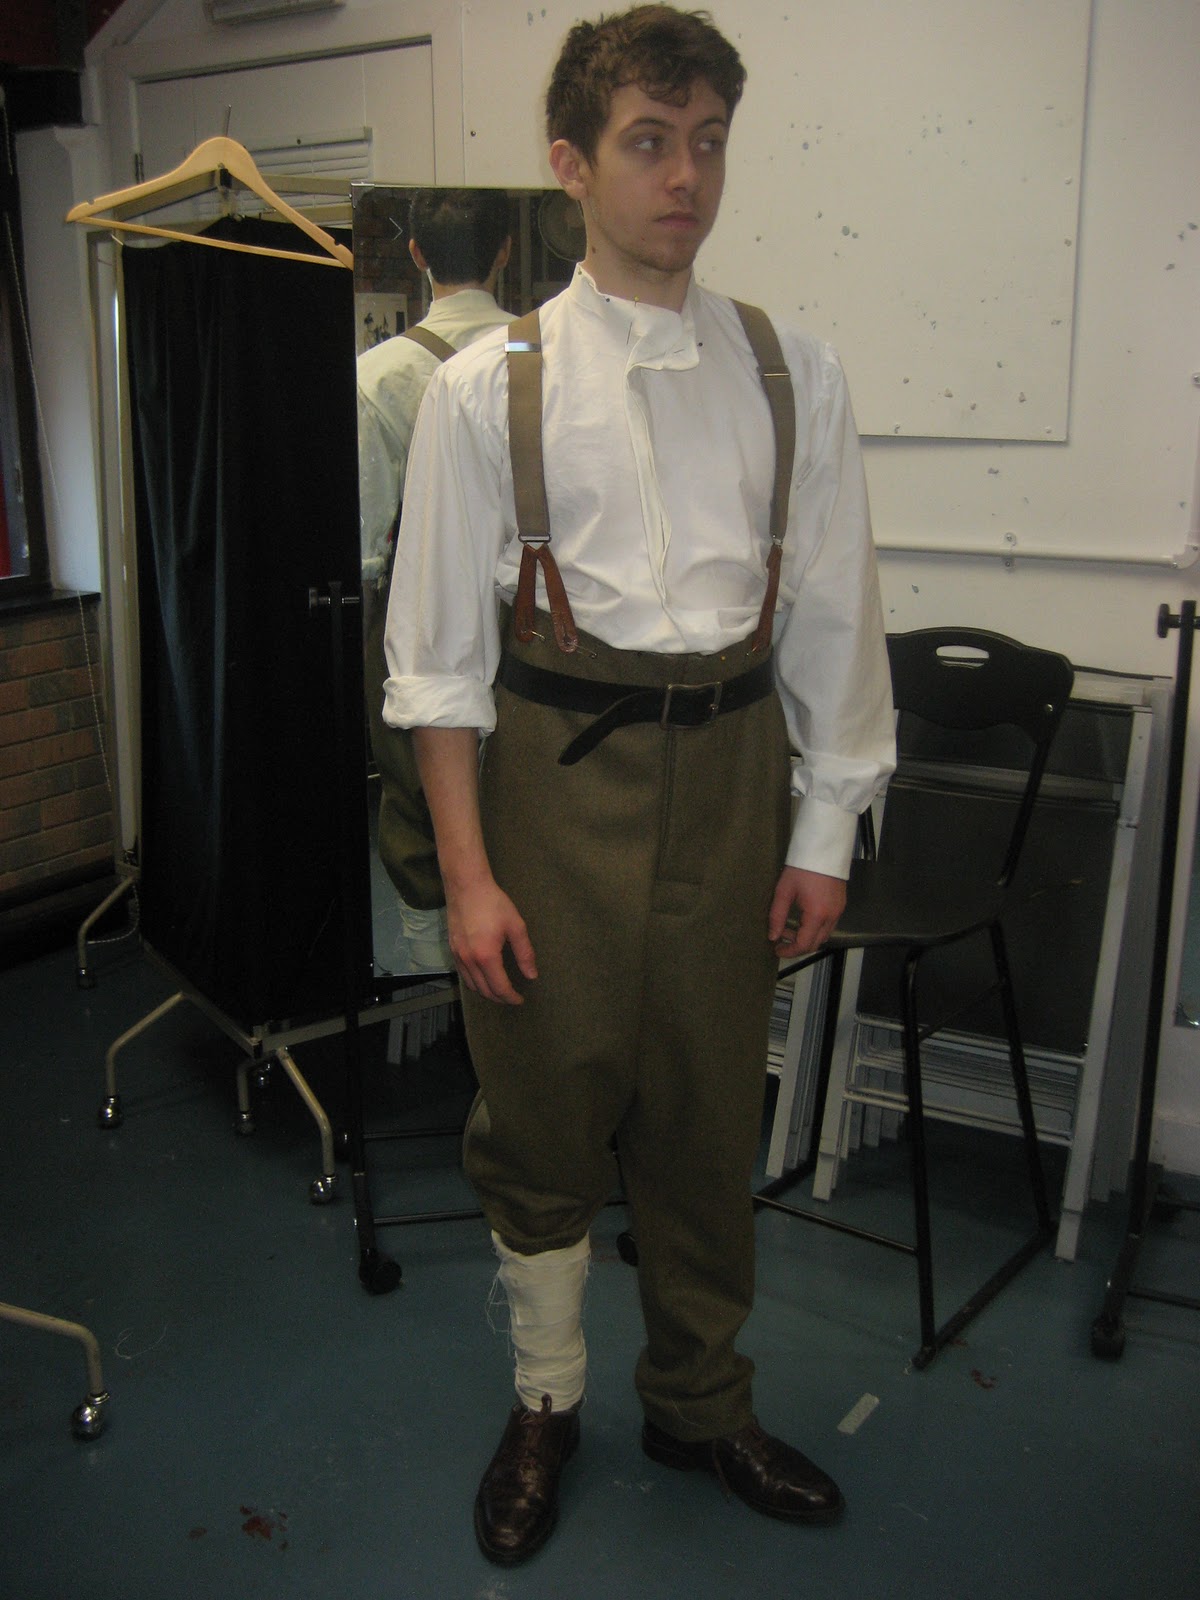 |
| Front View |
 |
| Side view |
 |
| Back view |
 |
| Putties in calico close up - these will be made from wool but calico is used to test the width and wrapping height for the Puttie. This width of 3inches works really well. |
 |
| Fastened cuff close up |
 |
| Close up of shirt from the back - some fabric needs to be taken out for a slightly better fit. Otherwise it fits well and is comfortable for the actor. |
Reflection:
The costume looks beautiful and really evokes a period feel especially with the braces that Grace and I found in the store which match perfectly. The black belt was doubted at first by the course leaders, but after debate it was decided a brown belt would look too co-ordinated with the shoes and braces, the black adds something so this will be kept. A belt loop will need to be added as it is currently too large for the actor. The shoes that we did find in the store purely for the purpose of the fitting were not correct as they were too modern but Rebecca thinks a brown oxford boot would look the part as the shoes also don't reach high enough up the leg to meet the putties. Buttons are needed for the shirt which must be a mother of pearl shell to fit the period. The fit of the trouser was great and it looks truly authentic, the breaking down to be added to the shoes trousers and shirt will complete it, especially when combined with the WWI rucksack I have sourced.
To Buy:
- Oxford boots in brown leather with leather sole
- Mother of Pearl buttons
- Possibly thread for top stitch

Wednesday 16 November 2011
Meeting with Production Team
Meeting with Pete and John to discuss technicalities of set so they are in mind and on the go once In Extremis concludes. Here are the key points of our discussion:
- The staging will be made from 8x4 rostra as I marked out in the set box which with either have small legs or none at all (reducing the stage height by a few centimeters). This will be got in on the rehearsal of Friday 2nd of Dec. so the Orchestra can check they fit/ actors can practise with step up.
- The blacks can be recycled if 3m high using gauze from previous show. These will be in the format showed in the scanned sketch below with reinforced corners and gaps to exit at the sides.
- Look at boxes in the studio - there are 8 overall that we can use and they can be stripped down for planking.
- The curtains will be old dust sheets to get the right texture. And will need a pully to operate them. They may need to be on separate curtain poles due to pros angle. Look into size/price of sheets.
- Chandeliar - possibly made out of wicker and paper mache/tissue paper - needs to be light and fire proof. If it is transparent then light will look like it is eminating from it.
- There will be black lino under rostra to protect dance floor and black matting under pallets to prevent them moving.
- Will felting be needed for entire orchestra rostra or just the percussion area?
From here I shall:
- Email Pete and John the set dimensions I drew up for Amber
- Investigate into dust sheet sizes for the Pros curtain (large 3.6x3.6m = £15.98, medium (3pk) 2.7x3.6m=£24.98)
- Look into black lino for floor beneath rostra
- Look on freecycle for iron/pallets
- Speak to Richard (Set builder) about wood needed/confirm dates of 3/4th of December for the build.

Meet with Richard
After the meetitng with Pete and John I went into the studio theatre to meet Richard (Set builder) and Debs (Set Painter) who looked at my set box. Richard is confirmed for the set build but we will need to get further painters in as well as Amber and I. The floorboards can be made from the In Extremis flooring and the pallets from the In Extremis structure which save a substancial cost and also recycle the wood used. Richard will precut the angles of the wood prior to the build to speed up the process. Debs offered advice on how to create the work I did in foamboard using polystyrene and meths and muslin to create the right texture for painting but also make it light. I will go over the set with Amber to create the technical drawing but also the materials that we will be required to order.
Devil Textures
A |
| Sample of layering with different colours and textures. There need to be some deeper blacks and it needs to be layered up thicker but otherwise it's looking good. I am not keen on the check fabric that hasn't dyed well. |
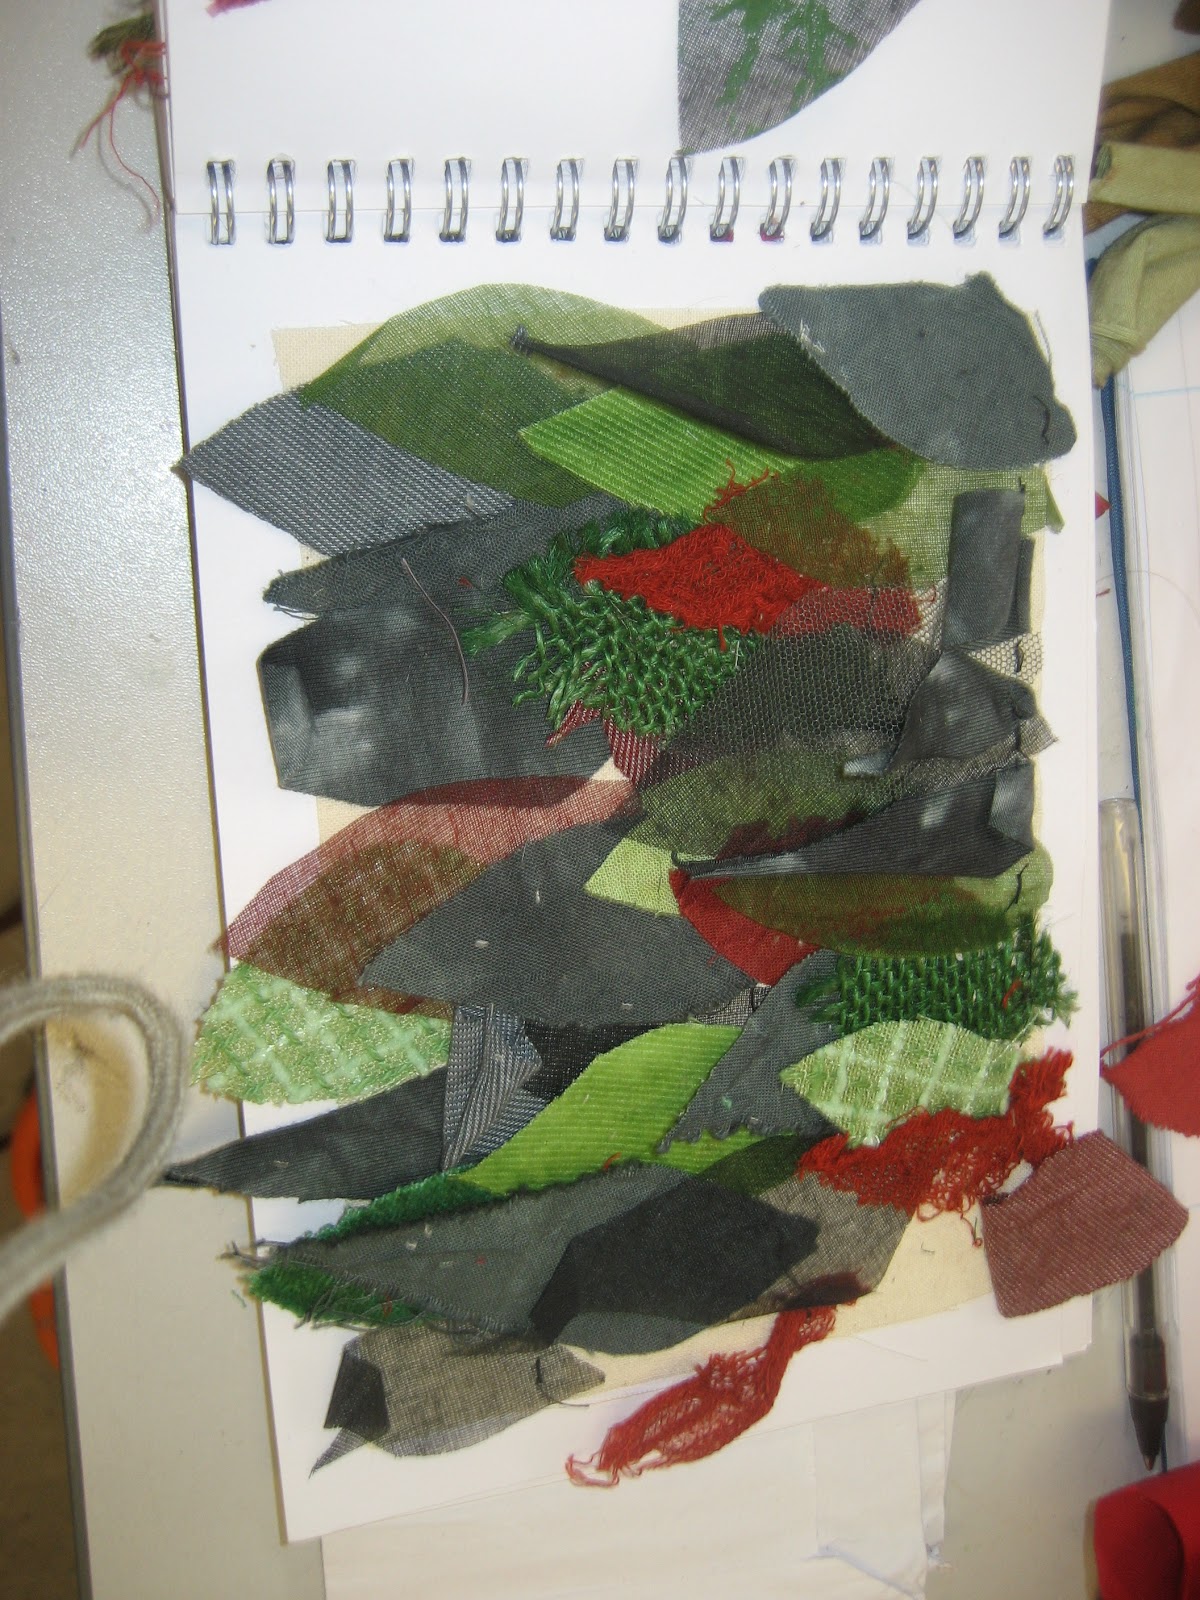
A selection of the textural sample that Emily has created for the Devil's final costume.
 |
| Texture added with puff paint, I love the red and green which will go with the autumnal leaves in the set decoration. The corduroy and puff paint combined create a lovely texture of the sinews of a leaf. |
 |
| Emily's shape samples taking inspiration from different elements of nature. This is great as the Devil needs to completely look as if she is covered in texture from natural sources as if risen from the earth. |
 |
| Puff paint used to create mould/lichen texture, they look great but will look better in smaller patches as the ones of the left look a little too large. I love the colouration. |
 |
| Dye samples of black in the variety of textures we bought. |
 |
| Same again for red, Emily hass done many of these to get an exquisite colour range. I love the scrim and hessian textures best as they will fray nicely and give bulk to the textured parts. The scrim in the green also looks very much like mould which will connect beautifully to the body suit beneath. |
 |
| Further layering experimentation, this sample looks better as it is thicker yet when the edges are frayed as it looks a little flat at the moment. |
Subscribe to:
Posts (Atom)